> ## Documentation Index
> Fetch the complete documentation index at: https://docs.adsumnetworks.com/llms.txt
> Use this file to discover all available pages before exploring further.
# Getting started
> Install Adsum IoT Coder, meet the requirements, and run your first loop.
## Install
Open the VS Code **Extensions** panel, search for **Adsum IoT Coder**, and click Install. Or install from the [VS Code Marketplace](https://marketplace.visualstudio.com/items?itemName=AdsumNetwork.nrf-ai-debugger) or [Open VSX](https://open-vsx.org/extension/AdsumNetwork/nrf-ai-debugger) (for Cursor, Windsurf, and VSCodium) directly.
You can start immediately. The [free tier](/free-tier) runs on a managed model, so there is no provider screen to clear first. Add your own key whenever you want.
## Set up your toolchain
Adsum drives your existing vendor toolchain, so install the one for your platform first. The agent detects it automatically.
* **Nordic nRF** install the [nRF Connect Extension Pack](https://marketplace.visualstudio.com/items?itemName=nordic-semiconductor.nrf-connect-extension-pack), which brings the nRF Connect SDK, toolchain, and SEGGER J-Link tooling.
* **Espressif ESP** install ESP-IDF (the [Espressif IDF extension](https://marketplace.visualstudio.com/items?itemName=espressif.esp-idf-extension) is the easiest path). Adsum detects the Espressif extension if it is present.
## See it work in 30 seconds
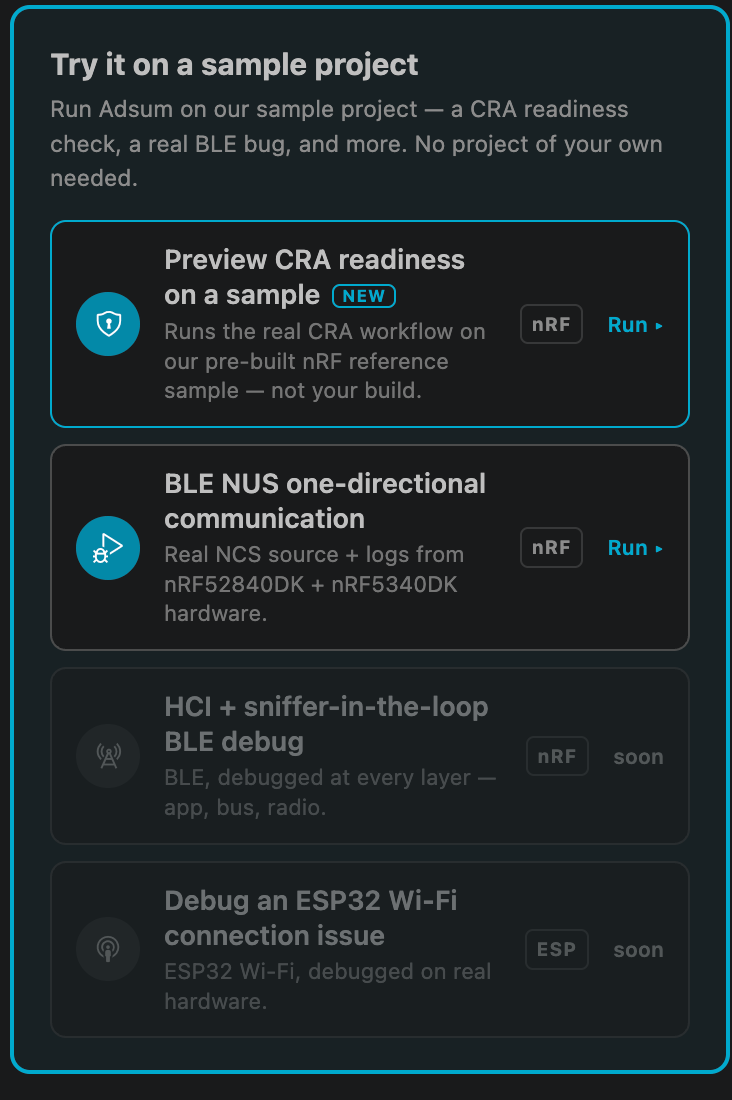
With nothing of your own open, the home lets you try it on a bundled sample project: debug a real BLE bug end to end (capture, analyze, fix on a genuine failure), or preview a CRA readiness check, with no board and no key. It is the fastest way to see how the agent works.
 ## It already knows your setup
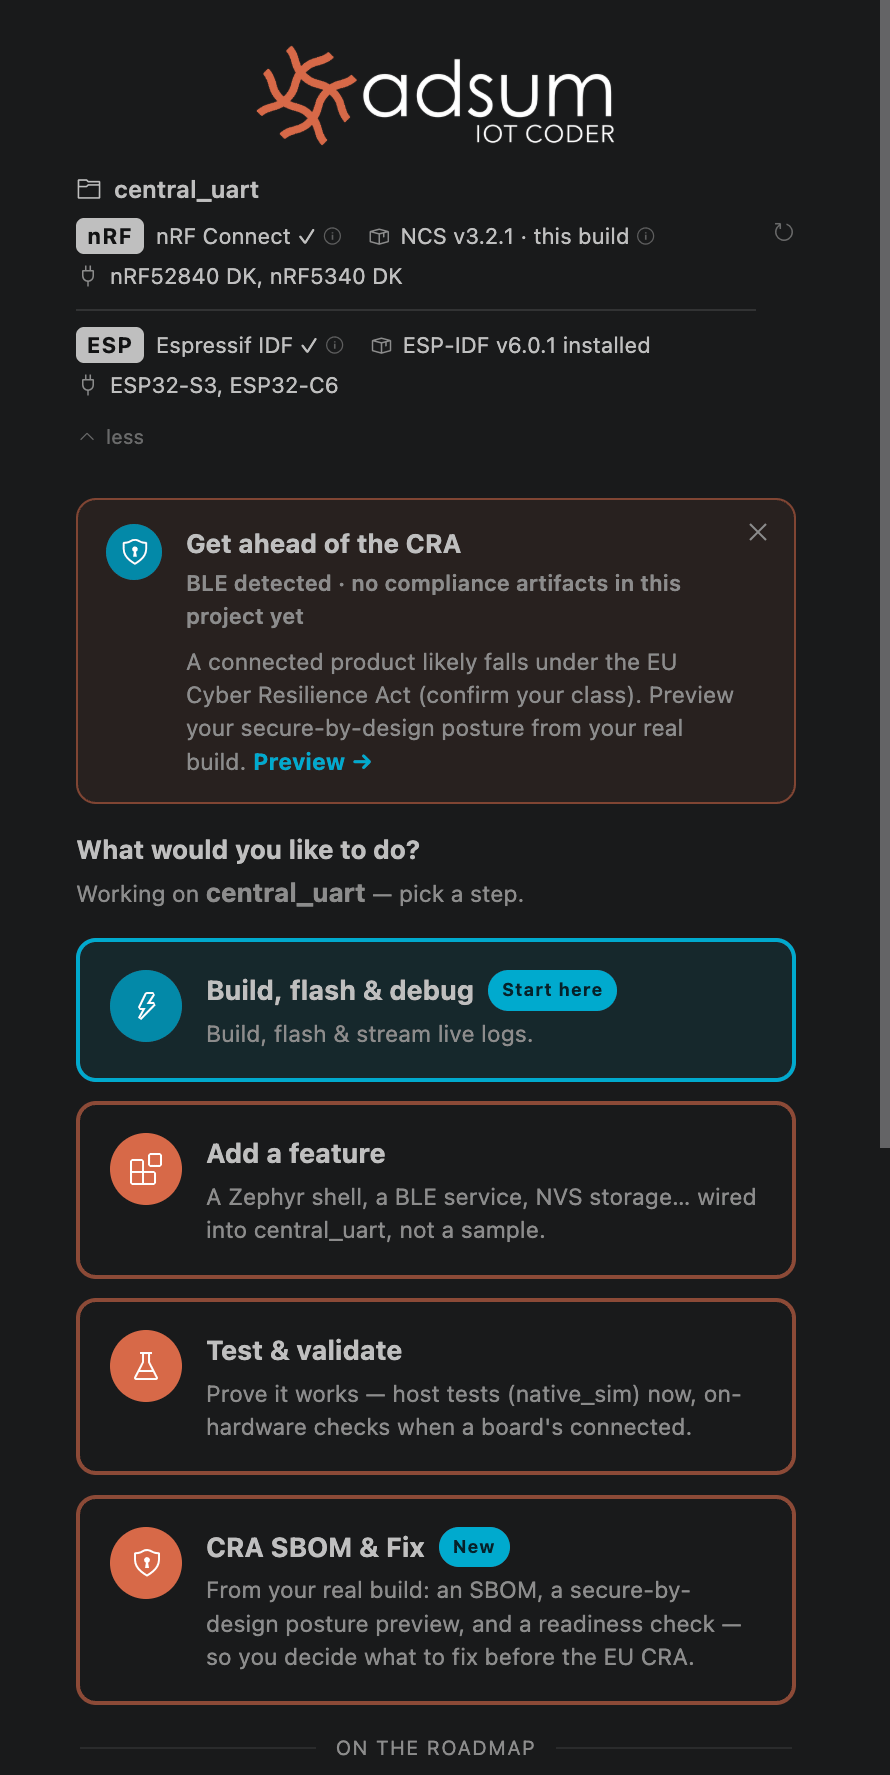
Before you open a project, the home reads your environment and auto-detects your nRF and ESP toolchains and any connected boards.
## It already knows your setup
Before you open a project, the home reads your environment and auto-detects your nRF and ESP toolchains and any connected boards.
 ## Then it adapts to your project
Open your nRF or ESP project and the agent reads what it is, detects your boards and toolchain, and offers the right one-click moves for daily work.
## Then it adapts to your project
Open your nRF or ESP project and the agent reads what it is, detects your boards and toolchain, and offers the right one-click moves for daily work.
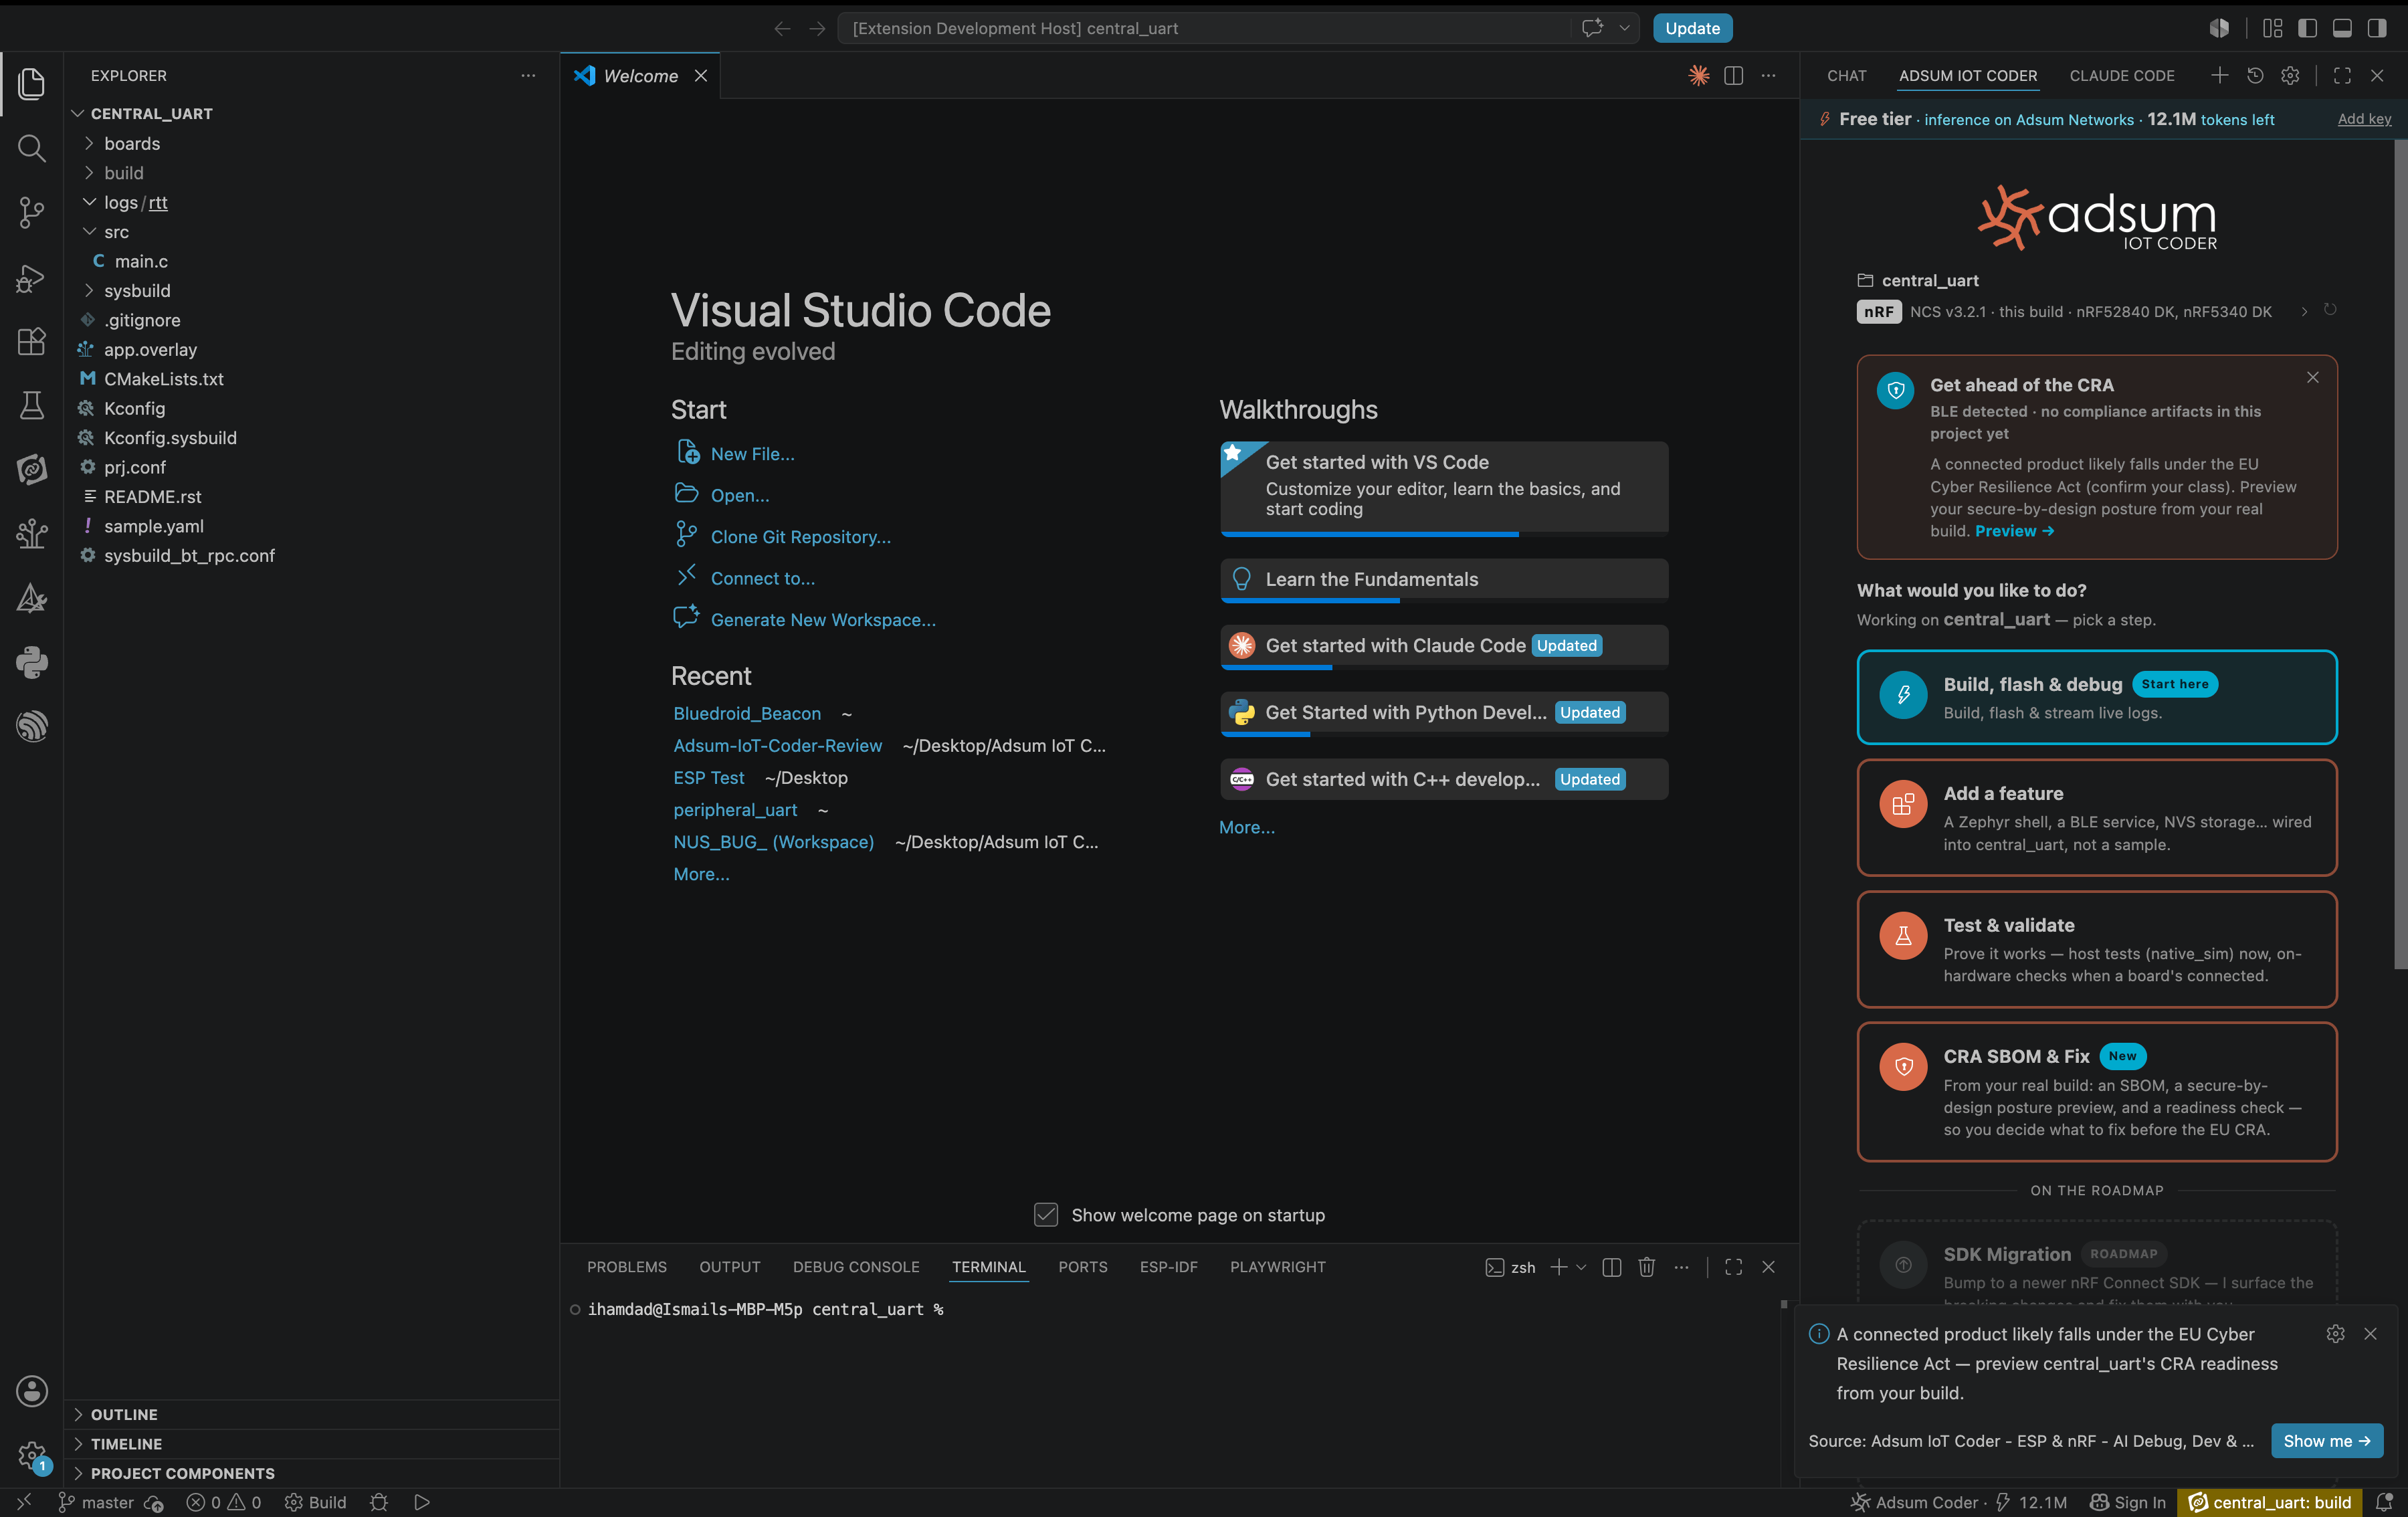 * **Build, flash & debug.** The full loop: build, flash, capture live logs (RTT/UART on nRF, serial monitor on ESP), find the issue, iterate until resolved. Boards auto-detect, with multi-device capture and source-aware correlation.
* **Add a feature.** Wire a new capability (a BLE service, a sensor, a shell, storage) into your actual project, not a throwaway sample.
* **Start a prototype.** Scaffold a new nRF or ESP-IDF project, set the target, and get to a first build.
* **Test & validate.** Exercise your firmware with host tests and on-hardware checks.
* **CRA SBOM & Fix.** One click builds an SBOM (SPDX), checks your secure-by-design posture from your real config, and helps you close a CVE, so you get ahead of the EU Cyber Resilience Act. See [CRA readiness](/cra-readiness).
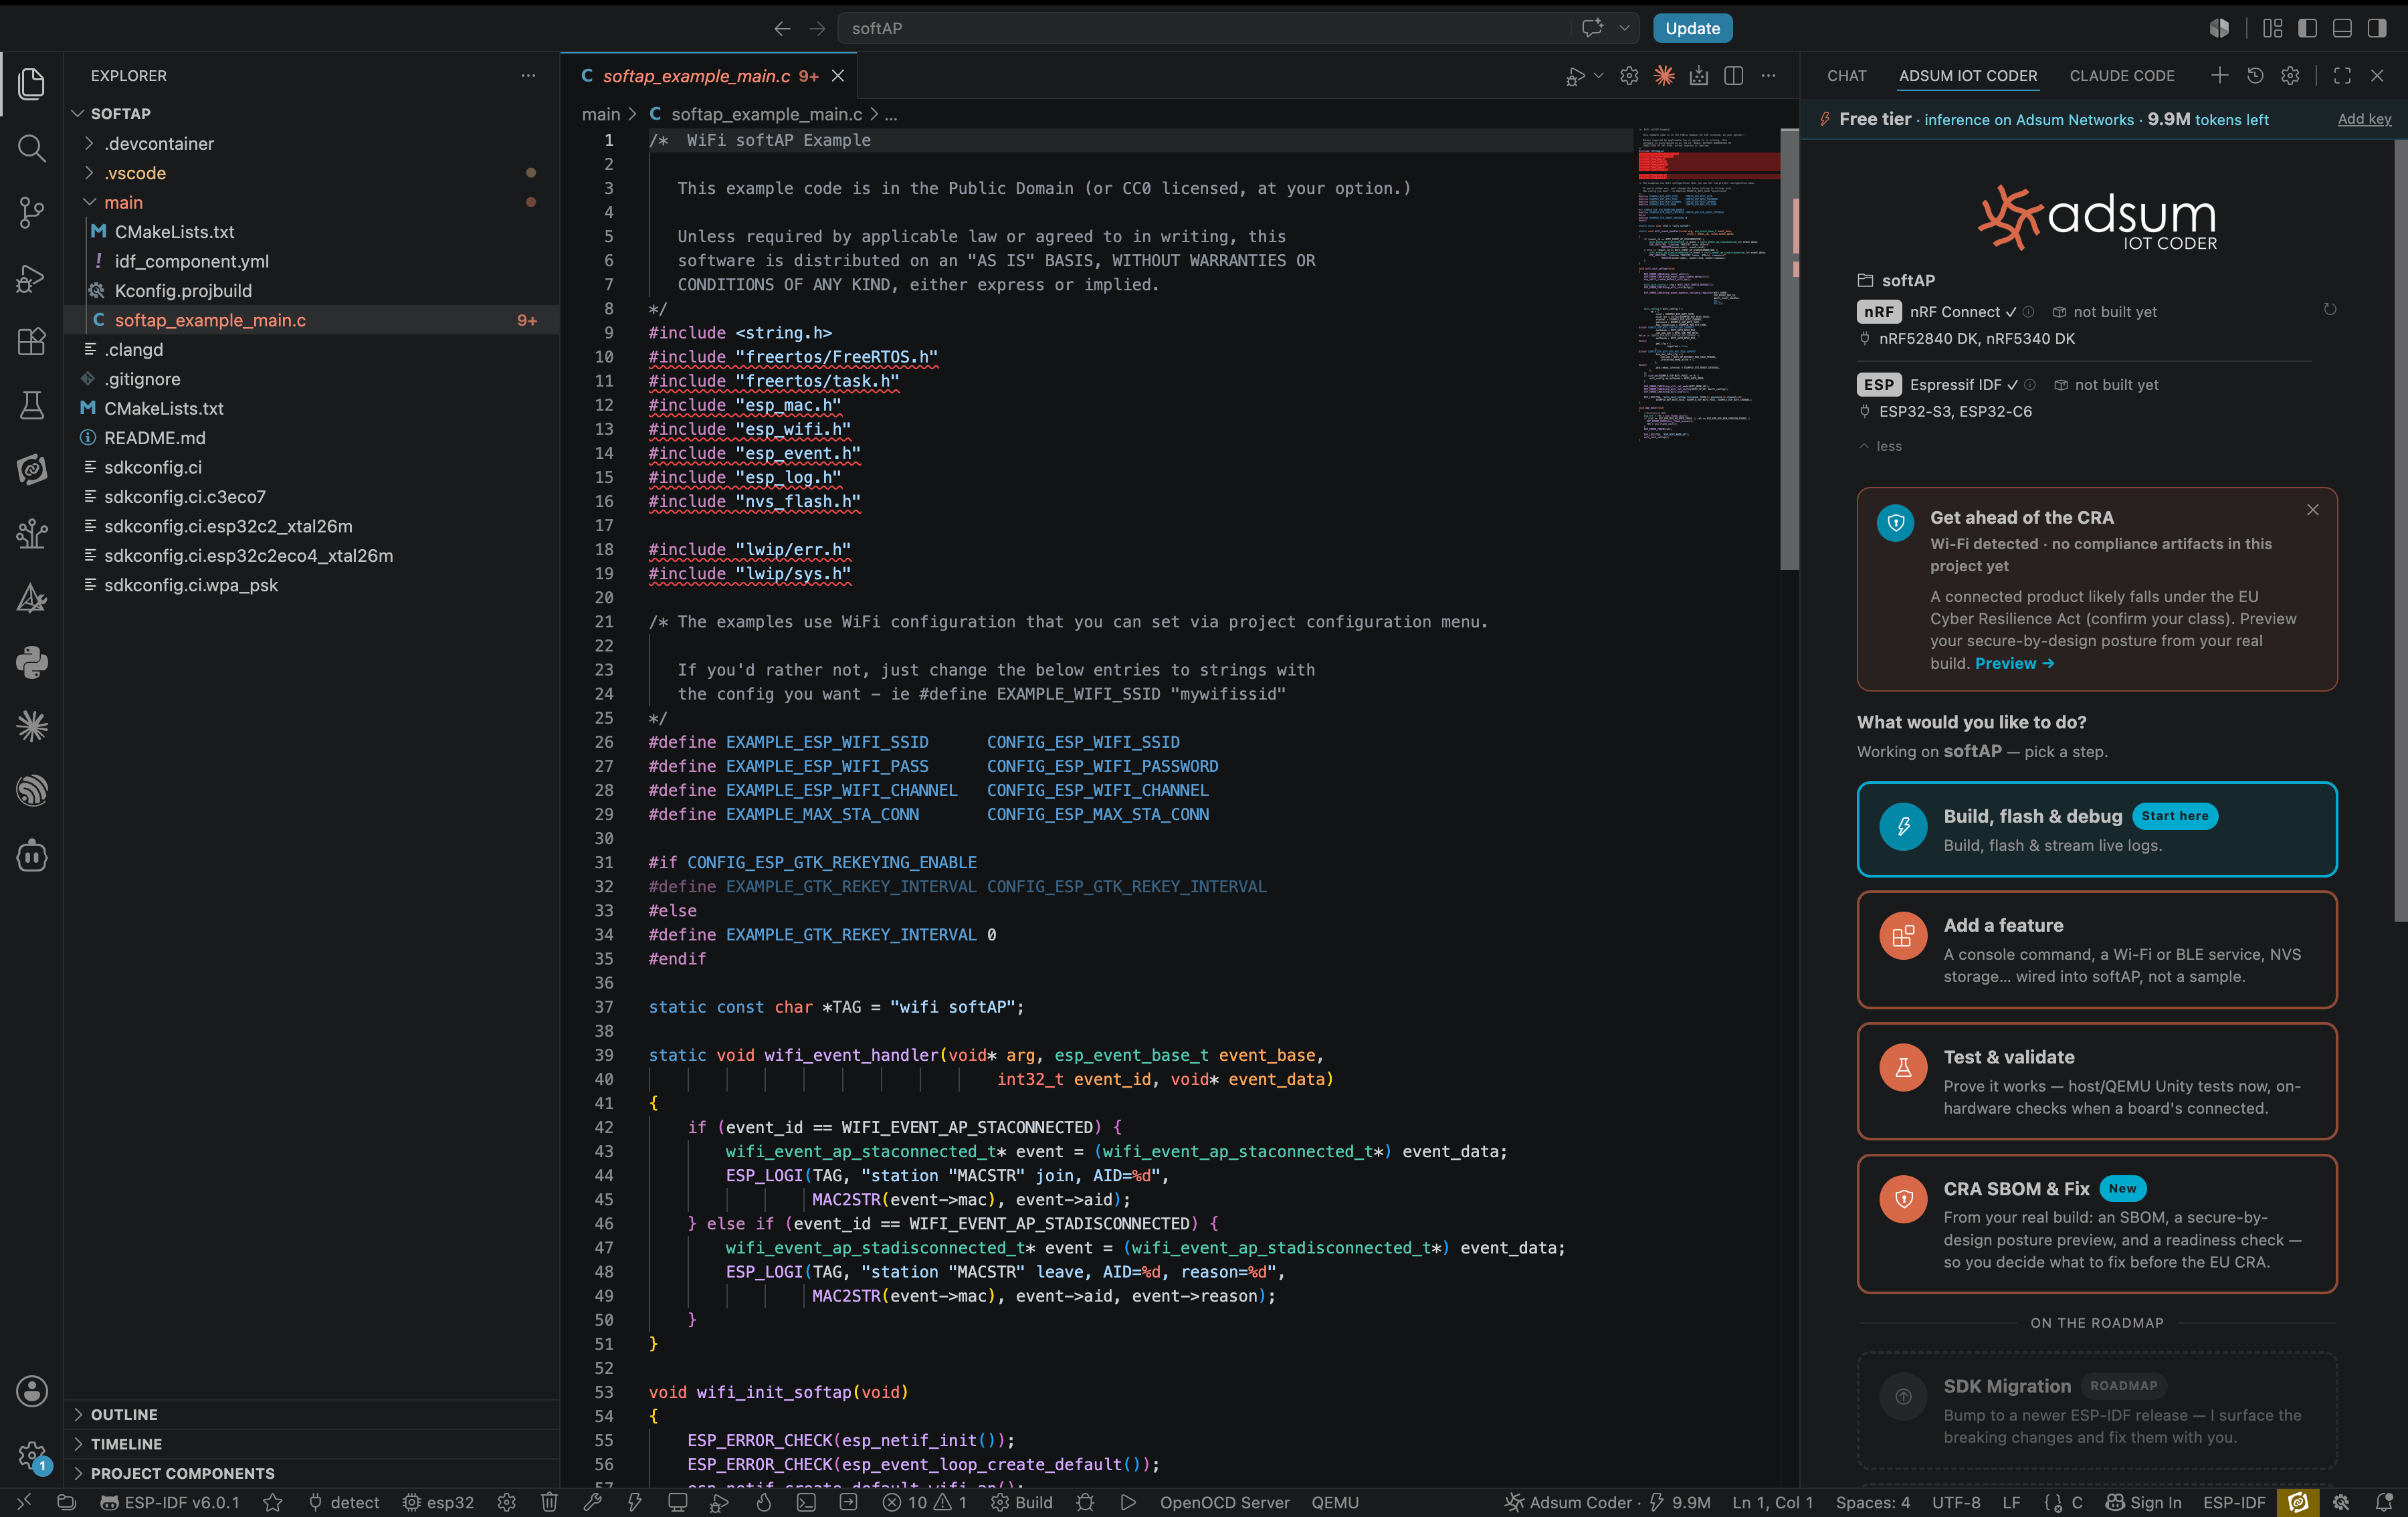
The same workflows drive ESP-IDF too:
* **Build, flash & debug.** The full loop: build, flash, capture live logs (RTT/UART on nRF, serial monitor on ESP), find the issue, iterate until resolved. Boards auto-detect, with multi-device capture and source-aware correlation.
* **Add a feature.** Wire a new capability (a BLE service, a sensor, a shell, storage) into your actual project, not a throwaway sample.
* **Start a prototype.** Scaffold a new nRF or ESP-IDF project, set the target, and get to a first build.
* **Test & validate.** Exercise your firmware with host tests and on-hardware checks.
* **CRA SBOM & Fix.** One click builds an SBOM (SPDX), checks your secure-by-design posture from your real config, and helps you close a CVE, so you get ahead of the EU Cyber Resilience Act. See [CRA readiness](/cra-readiness).
The same workflows drive ESP-IDF too:
 After any task finishes, the agent suggests where to go next, so you are never left at a blank prompt. See [workflows](/workflows) for the full set of everyday jobs.
## Your first debug loop
With no board and no project, run the bundled demo from the home. It debugs a real BLE bug on bundled firmware, so you see the capture-analyze-fix loop end to end.
Open an nRF or ESP-IDF project. The agent reads it, detects your boards and toolchain, and shows the workflow cards that fit it.
Pick **Build, flash & debug**. The agent builds, flashes, captures live logs, and iterates with you until the issue is resolved.
## Requirements
| Requirement | Details |
| :----------------- | :------------------------------------------------------------------------------------------------------------------------------------------------------------------------------------------------------------------------- |
| **Platforms** | Nordic nRF (nRF Connect SDK / Zephyr) and Espressif ESP32 (ESP-IDF) |
| **Supported SoCs** | nRF52, nRF53, nRF54 · ESP32, ESP32-S3, ESP32-C6 |
| **Protocols** | BLE (nRF and ESP), Wi-Fi (ESP) |
| **Toolchain** | The [nRF Connect Extension Pack](https://marketplace.visualstudio.com/items?itemName=nordic-semiconductor.nrf-connect-extension-pack) for nRF; an ESP-IDF install for ESP (the Espressif extension is detected if present) |
| **Python** | 3.8 or newer |
| **AI provider** | Any OpenAI- or Anthropic-compatible endpoint, cloud or local. See [Models](/models). The free tier is on by default. |
Start with Claude Haiku 4.5 (the benchmark model), or bring any OpenAI-compatible key.
After any task finishes, the agent suggests where to go next, so you are never left at a blank prompt. See [workflows](/workflows) for the full set of everyday jobs.
## Your first debug loop
With no board and no project, run the bundled demo from the home. It debugs a real BLE bug on bundled firmware, so you see the capture-analyze-fix loop end to end.
Open an nRF or ESP-IDF project. The agent reads it, detects your boards and toolchain, and shows the workflow cards that fit it.
Pick **Build, flash & debug**. The agent builds, flashes, captures live logs, and iterates with you until the issue is resolved.
## Requirements
| Requirement | Details |
| :----------------- | :------------------------------------------------------------------------------------------------------------------------------------------------------------------------------------------------------------------------- |
| **Platforms** | Nordic nRF (nRF Connect SDK / Zephyr) and Espressif ESP32 (ESP-IDF) |
| **Supported SoCs** | nRF52, nRF53, nRF54 · ESP32, ESP32-S3, ESP32-C6 |
| **Protocols** | BLE (nRF and ESP), Wi-Fi (ESP) |
| **Toolchain** | The [nRF Connect Extension Pack](https://marketplace.visualstudio.com/items?itemName=nordic-semiconductor.nrf-connect-extension-pack) for nRF; an ESP-IDF install for ESP (the Espressif extension is detected if present) |
| **Python** | 3.8 or newer |
| **AI provider** | Any OpenAI- or Anthropic-compatible endpoint, cloud or local. See [Models](/models). The free tier is on by default. |
Start with Claude Haiku 4.5 (the benchmark model), or bring any OpenAI-compatible key.